
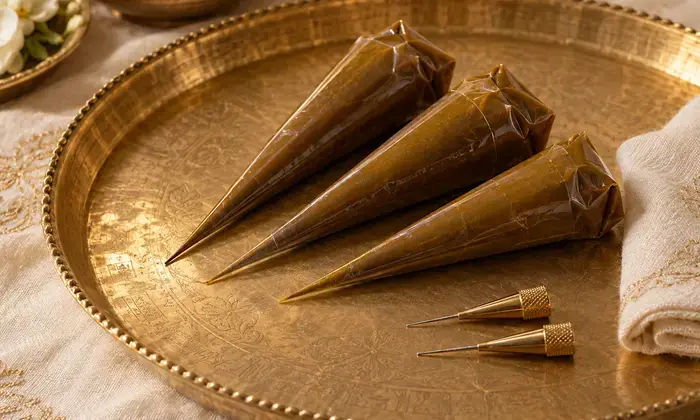
You do not need a large kit to start learning mehndi. A few well-chosen accessories are enough to observe your lines, organise your space and begin with confidence.
The Essential Item: A Suitable Applicator
The first thing you need is a preparation compatible with a fine applicator: a ready-to-use cone or a tool designed for patterns. To get used to the movements, choose something comfortable to hold. A poorly filled cone that is too hard to squeeze may tire your fingers before you have really started drawing.
Setting Up a Practical Workspace
A stable table, good lighting and a suitable practice surface make the first attempts more enjoyable. Have paper or a practice board ready if suitable for the preparation, along with something to clean your workspace promptly. If you draw on your own hand, position yourself so your arm is supported. A comfortable position often helps more than an expensive accessory.
Useful Tools That Are Not Essential
A simple visual reference can help you reproduce a composition. A small notebook lets you record the shapes you like. You can also set aside space to store cones according to their storage instructions. There is no need to start with a collection of tips, stencils and professional accessories: first learn to use what you already have.
What Equipment Cannot Replace
Even an excellent applicator will not instantly turn a beginner's hand into an artist's hand. Consistency comes from taking time to observe the line. Our earlier cone guide explains the movements in detail; this page is mainly intended to help you assemble a sensible starter kit.
A Starter Kit Without Unnecessary Purchases
To practise, you first need a suitable surface, a product intended for your chosen use, an appropriate applicator and something to protect your workspace. A reusable practice surface can be convenient, but it is not essential: an easy-to-clean, non-porous surface is already enough to practise the movements. There is no point buying twenty accessories before knowing whether you prefer flowers, lines or dots. Start with the basics and add equipment only when you identify a real limitation.
A Starter Kit Is Not an Accessory Collection
You can begin with very little equipment. A classic mistake is to buy several applicators, stencils, oils, powders and finishing products at the same time without yet knowing what they are for. For learning, you mainly need a preparation clearly labelled as suitable for skin use, an appropriate applicator and a surface on which to test lines before attempting a full design.
Your workspace matters just as much as the tools: a stable table, lighting that does not cast shadows over your hand, and somewhere to set the applicator down without it rolling away. A small tray reserved for drawing prevents the cone from touching dirty objects. A towel or washable protective covering makes tidying up easier and reduces unnecessary handling.
Table: Essential, Useful or Optional
| Item | Status for beginners | Reason |
|---|---|---|
| Clearly identified preparation suitable for its intended use | Essential | You need to know what you are applying |
| Compatible cone or applicator | Essential | It determines how the paste flows |
| Non-porous test surface or practice board | Very useful | Lets you observe lines without drawing on skin |
| Consistent lighting and work surface | Very useful | Helps you see irregularities |
| Stencils, templates or printed designs | Optional | Help you choose a shape without replacing manual skill |
| Multiple nozzles and accessories | Optional | Unnecessary until you know what you lack |
A practice hand can be enjoyable to use, but it is not compulsory: a suitable clean surface is enough for your first attempts at producing consistent lines. Optional commercial example: if you would like to compare the available formats, OrientalDiscount sells a henna practice hand.
Choosing an Applicator Instead of Stockpiling Cones
A cone with an opening that is too wide will struggle to produce tiny details; an excessively fine tip may become blocked if the paste is not sufficiently uniform. The aim is not to find “the smallest tip”, but to strike a balance between line thickness and ease of flow. Observe what your equipment can do, then adapt your pattern style accordingly.
For your first session, try three marks: a continuous line, a curve and then a dot. If you cannot produce them with reasonable consistency on a test surface, adding a brush or an expensive accessory will not necessarily solve the problem. First determine whether the cause is the paste, the tip or your technique.
Practising Without Waste
Take a protected sheet or a purpose-made practice surface and divide a square into four areas. Use the first for lines, the second for curves, the third for dots and the fourth for a small combination of all three. Photographing the result at the end of the session lets you see your progress; there is no need to keep dozens of practice sheets.
This procedure is intended to assess consistency, not to test colour on skin. It gives you immediate feedback on precision and allows you to compare how different tips perform without buying more equipment. Detailed instructions on holding a cone can be found in our earlier guide to using one.
Storage Is Part of Your Equipment Setup
Set aside one place for the paste packaging and instructions, another for clean accessories and a third for practice materials. Plan how to wipe down the work surface appropriately; do not reuse tools that are dirty or damaged. Avoid mixing products in the same bag if you will no longer be able to identify their origins.
A genuinely practical beginner's kit is therefore not the biggest one. It is the one in which you can quickly find your applicator, the product's ingredient information and a surface on which to practise. Once you identify a specific need — such as difficulty drawing fine details — you can make an informed decision about adding another tool.
Frequently Asked Questions
Do I need several cones to get started?
Not necessarily. One suitable applicator may be enough for your first attempts.
Is a stencil essential?
No. It may be useful, but it is not compulsory.
What is the best initial investment?
A clearly identified product and a comfortable workspace.
Sources and References
- FDA — Temporary Tattoos, Henna/Mehndi, and Black Henna: https://www.fda.gov/cosmetics/cosmetic-products/temporary-tattoos-hennamehndi-and-black-henna-fact-sheet