
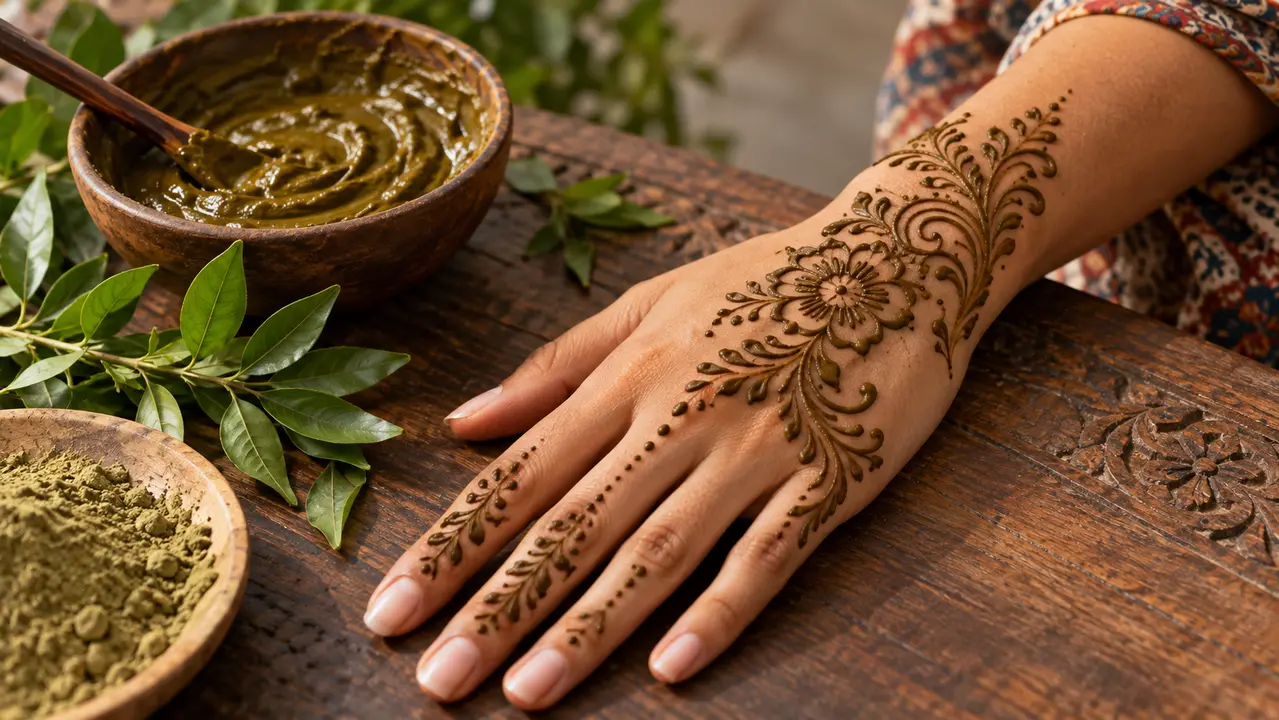
Discover natural henna tattoos: colours, placement, designs, preparation and the right questions to ask before you begin.
Contents
- A temporary tattoo, but not an ordinary drawing
- Understanding colours before choosing
- Where should you place your first design?
- From sketch to finished design
- What does a successful session look like?
- Choosing a seller and keeping expectations realistic
- How to brief a henna artist
A temporary tattoo, but not an ordinary drawing
Natural henna tattoos appeal because they transform the appearance of the skin for a few days without needles. Yet they are not stickers: the paste placed on the skin gradually leaves a stain that develops over time. An orange line just after removing the paste may turn reddish-brown the following day. This is why a photograph taken immediately after application does not always give a good idea of the final result.
Natural henna comes from the leaves of Lawsonia inermis. The word “tattoo” is convenient in everyday conversation, but it should not be confused with a permanent tattoo: no pigment is injected. The colour fades as the skin's surface renews itself. This difference explains both its appeal and its limitations.
Understanding colours before choosing
A preparation made from genuine henna does not produce an immediate black stain. Its range of shades runs from orange to reddish-brown, with variations depending on the area, the paste and contact time. The palms or soles often develop a deeper shade than the forearms. Two designs made with the same cone may therefore look somewhat different.
Do not choose a product solely on the basis of an oversaturated image on social media. Check its designation, ingredient list, intended use and the manufacturer's instructions. White or glittery decorative products, and black formulations containing other colourants, do not necessarily work like plant-based henna. Our specialist guide to colours and black henna explains these differences without treating them as equivalent.
Where should you place your first design?
The back of the hand is very photogenic, but daily activities and washing affect how long a design lasts. The wrist lends itself to a bracelet effect that is easy to coordinate with an outfit; however, sleeves or jewellery may rub against it frequently. Fingers are suitable for fine, rhythmic patterns, provided you take their creases and the available space into account.
For a first attempt, a simple, well-placed design is better than one covering the whole hand. Think about how you use that part of your body: writing, working, cooking or wearing a ring. A beautiful photograph should not make you overlook comfort. Our specialist guides offer inspiration by placement rather than fifty scattered examples here.
Remember: before trusting a promise or a photograph, always check what kind of product it is and what you want the design to achieve.
From sketch to finished design
First choose a style: floral, geometric, minimalist or inspired by elaborate mehndi compositions. Then identify the main element: a flower, a border or a central motif. The smaller details come afterwards. In a sketch, experiment with the balance between decorated areas and empty space. Negative space often makes lines stand out more effectively than filling everything in.
Choosing between powder to mix yourself and a ready-to-use cone depends on whether you want to prepare the paste and how familiar you are with drawing. For a first use, a clearly labelled preparation suitable for application to the body makes things simpler. The precise instructions for using a cone have their own long-established guide; there is no need to repeat them here.
What does a successful session look like?
The first step is to discuss the design and the expected outcome. A henna artist may ask to see a few references and adapt the design to the size of your hand. The loveliest results are not always the most elaborate: a clearly defined centre of the hand and a few coherent lines can look better than a densely copied photograph.
The paste should be applied to clean skin according to the product's instructions. It remains in place for the time specified for that formulation and is then removed using the recommended method. The colour may continue to develop. Understanding this sequence is useful when organising a ceremony or planning photographs: if the colour needs to be fully developed on a particular day, do not leave it until the last minute to discover how your preparation behaves.
Choosing a seller and keeping expectations realistic
A specialist shop should make it possible to understand what you are buying: brand, intended use, composition where available, quantity and storage advice. Be wary of absolute promises such as “guaranteed colour on all skin types” or “no risk”. They oversimplify a result that naturally varies.
If you are looking for supplies, you can browse OrientalDiscount's henna selection. Hennediscount has a commercial relationship with this shop: the link is offered as a purchasing option, not as independent evidence of superiority. You can also compare the information provided by other specialist sellers.
How to brief a henna artist
For a ceremony, bring no more than two or three examples for inspiration, not fifty conflicting photographs. Specify which part of your body you would like decorated, how much time is available and which details you particularly like. Also ask how the preparation is applied and when the colour will become visible. A professional can adapt the composition to finger length, ring placement and your preferences rather than mechanically copying an image.
If you are undecided between a very dense design and a lighter one, look at the empty spaces in each example. On a small hand, an overloaded composition can lose its delicacy. Harmony comes from hierarchy: a main motif, secondary elements and a rhythm of details.
Frequently asked questions
Can natural henna be black?
Not with Lawsonia inermis powder alone. Black preparations contain other ingredients; their composition and intended use need to be examined.
Which area should I choose as a beginner?
A small design on the back of the hand or the wrist is a pleasant way to try it, but appearance and durability vary by area.
Do I need to know how to draw?
No. Start with a simple composition with consistent lines, then add details if you wish.
When will I see the final colour?
The shade may develop over the 24 to 48 hours after removal, depending on the preparation and the skin.
Is a design necessarily traditional?
No. You can enjoy cultural inspiration or prefer a contemporary design without attributing invented symbolism to it.
Further reading
Sources and references
- Kew — https://powo.science.kew.org/ (for relevant background; not to be interpreted as commercial endorsement)
- FDA — https://www.fda.gov/cosmetics/cosmetic-products/temporary-tattoos-hennamehndi-and-black-henna-fact-sheet (for relevant background; not to be interpreted as commercial endorsement)